Connecting your Namecheap domain to Shopify is straightforward. This guide will show you how.
Table of Contents
Setting up a custom domain can enhance your brand’s professional look. Namecheap is a popular choice for buying domains due to its affordability and ease of use. Shopify, on the other hand, is a leading e-commerce platform known for its user-friendly interface and powerful tools.
By linking your Namecheap domain with Shopify, you can create a seamless and personalized online store experience. This guide walks you through each step, ensuring you can quickly and efficiently get your domain connected and your store up and running. Whether you’re a beginner or have some tech experience, this process will be simple and manageable.
Credit: www.namecheap.com
Introduction To Namecheap And Shopify
Welcome to the world of domain management and e-commerce. If you want to connect your Namecheap domain to your Shopify store, you’re in the right place. Understanding both platforms is the first step.
What Is Namecheap?
Namecheap is a popular domain registrar. They provide affordable domain names. Namecheap also offers web hosting and other related services. They are known for their user-friendly interface. Many users prefer Namecheap for its low prices and reliability.
What Is Shopify?
Shopify is a leading e-commerce platform. It helps you build and manage online stores. With Shopify, you can sell products online easily. It offers various tools for marketing, payments, and shipping. Entrepreneurs and businesses choose Shopify for its simplicity and features.

Credit: help.shopify.com
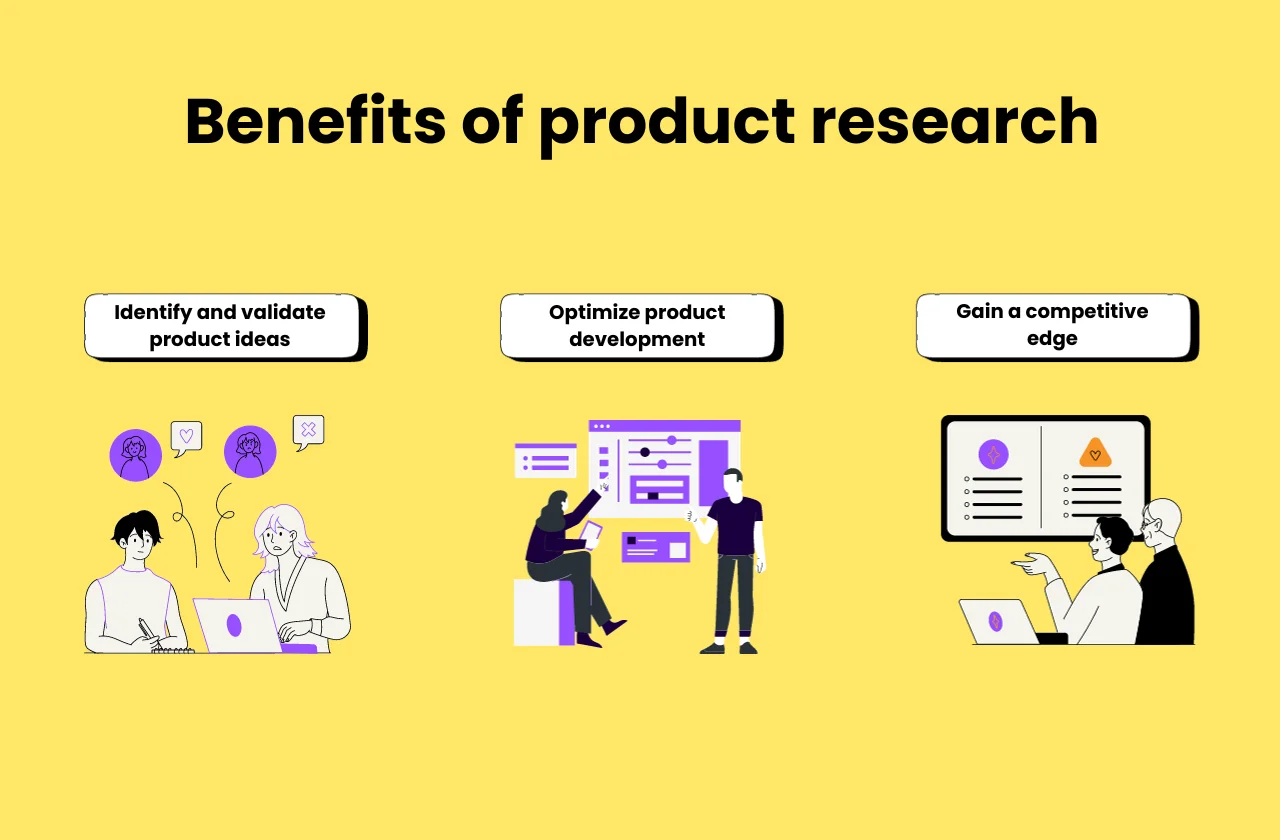
Benefits Of Using Namecheap With Shopify
Combining Namecheap with Shopify offers numerous advantages. These include cost savings and reliable services. This duo makes it easy to manage your online store. Let’s delve into the benefits.
Cost-effective Solutions
Using Namecheap with Shopify is budget-friendly. Namecheap provides affordable domain registration. Their prices are often lower than other registrars. This helps you save money for other business needs.
Here’s a quick comparison of domain prices:
| Registrar | Annual Cost |
|---|---|
| Namecheap | $8.88 |
| Other Registrars | $12.99 |
Additionally, Namecheap offers free WHOIS privacy protection. This protects your personal information without extra costs. Free DNS management is another benefit. It ensures smooth domain setup on Shopify.
Reliable Services
Namecheap boasts excellent customer support. Their team is available 24/7 to assist you. This ensures any issues are resolved swiftly.
Some key features of Namecheap’s services include:
- 99.99% uptime guarantee
- Easy-to-use interface
- Fast domain propagation
These features ensure a seamless experience. Your Shopify store will run smoothly without downtime. Managing your domain with Namecheap is simple. Their user-friendly dashboard makes it easy.
Overall, using Namecheap with Shopify offers significant benefits. It’s a cost-effective and reliable choice for your online store.
Purchasing A Domain On Namecheap
Purchasing a domain on Namecheap is an easy and quick process. Namecheap offers a wide range of domain names at affordable prices. This guide will help you buy a domain and link it to your Shopify store.
Domain Search
First, go to Namecheap’s website and use their domain search tool. Type the name you want for your domain. The tool will show available options. Choose the one that fits your brand best.
Domain Registration
After selecting your domain, click on the “Add to Cart” button. Review your cart and proceed to the checkout. Create an account if you do not have one yet. Fill in your personal details and complete the purchase. Now, your domain is registered.
Preparing Your Domain For Shopify
Preparing your domain for Shopify involves a few crucial steps. These steps ensure your domain connects smoothly with your Shopify store. First, you need to access your domain settings on Namecheap. Then, update your DNS records. This process is essential for a seamless transition. Let’s dive into each step to make it easy.
Accessing Domain Settings
Log in to your Namecheap account. Go to the “Dashboard”. Find your domain from the list. Click on “Manage” next to your domain. This will open the domain settings page. Here, you can make necessary changes.
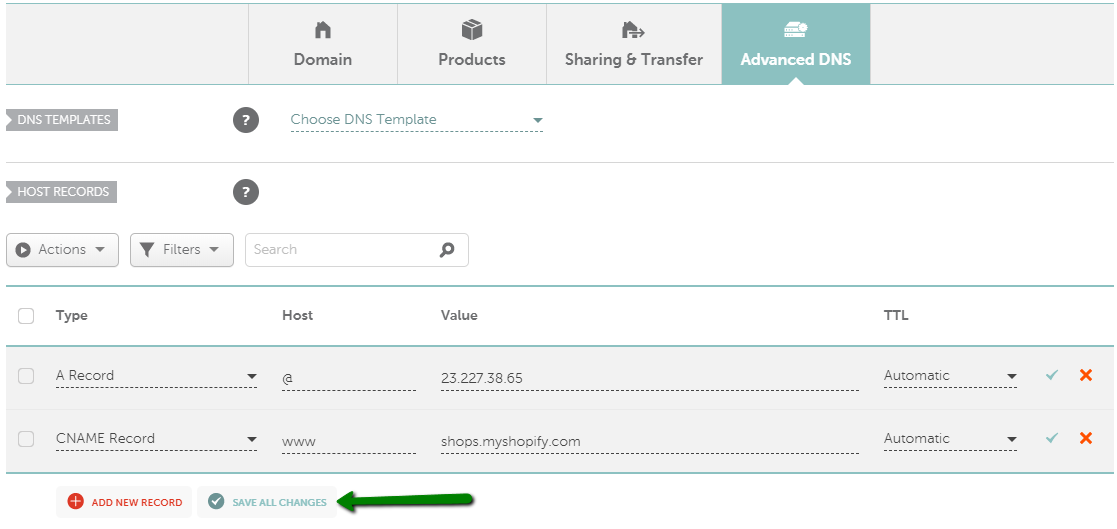
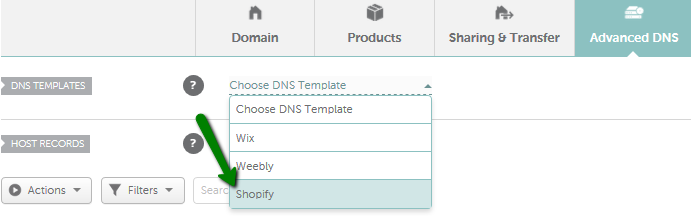
Updating Dns Records
In the domain settings, find the “Advanced DNS” tab. Click on it. Look for the “Host Records” section. You need to update the “A Record” and “CNAME Record”. For the “A Record”, set the value to Shopify’s IP address. For the “CNAME Record”, set it to Shopify’s domain. Save your changes. This connects your domain to Shopify.
Connecting Namecheap Domain To Shopify
Connecting your Namecheap domain to Shopify helps create a professional online presence. It also makes it easier for customers to find your store. By following a few simple steps, you can connect your custom domain to Shopify. This guide will walk you through the entire process.
Accessing Shopify Admin
First, log in to your Shopify account. Use your email and password to access your admin panel. Once logged in, you’ll see your Shopify dashboard. This is where you can manage your store.
On the left side of the dashboard, find “Settings.” Click on it to open a new menu. In this menu, look for “Domains” and click on it. This will take you to the domain management page.
Adding Custom Domain
On the domain management page, you’ll see an option to “Connect existing domain.” Click on it. A new field will appear asking for your domain name. Enter your Namecheap domain and click “Next.”
Shopify will now provide you with DNS settings. Open a new tab and log in to your Namecheap account. Go to your “Domain List” and select the domain you want to connect. Click on “Manage” next to the domain name.
In the domain management settings, find the “Advanced DNS” tab. Here, you’ll need to update your DNS settings to match the ones given by Shopify. Add or edit the necessary records, such as A and CNAME records.
After updating the DNS settings, go back to Shopify. Click “Verify Connection.” Shopify will check the DNS settings to ensure they are correct. This process might take a few minutes. Once verified, your Namecheap domain will be connected to your Shopify store.
Credit: www.namecheap.com
Verifying Domain Connection
Verifying your domain connection is a critical step after setting up your Namecheap domain on Shopify. This process ensures your domain is correctly linked to your Shopify store. It helps avoid issues with visitors accessing your site. Below, we cover the steps to check your domain status and troubleshoot common issues.
Domain Status Check
To verify the domain connection, follow these steps:
- Log in to your Shopify admin panel.
- Navigate to Online Store > Domains.
- Look for your custom domain in the list.
- Check the status next to your domain name.
If the status shows “Connected”, your domain is properly set up. If not, further actions are needed.
Common Domain Statuses
| Status | Description |
|---|---|
| Connected | Your domain is properly linked to your Shopify store. |
| Not Connected | Your domain settings need to be adjusted. |
| Verification Pending | Your domain is being verified. This can take up to 48 hours. |
Troubleshooting Issues
If your domain status is “Not Connected”, follow these steps:
- Double-check your DNS settings in Namecheap.
- Ensure the A Record points to Shopify’s IP: 23.227.38.65.
- Check if the CNAME points to shops.myshopify.com.
If the status remains unchanged, clear your browser cache and refresh the page. Sometimes, changes take a while to reflect.
For the Verification Pending status:
- Wait for 48 hours. This is a standard verification time.
- If it persists, contact Namecheap support to ensure DNS settings are correct.
Proper domain setup ensures a seamless experience for your visitors. Regularly check and update your settings.
Setting Up Email Forwarding
Setting up email forwarding ensures you do not miss important messages. It allows you to create a professional email address for your Shopify store. This guide will help you set up email forwarding using your Namecheap domain.
Email Forwarding Options
Namecheap offers several email forwarding options. You can set up an email alias to forward emails to your existing account. This means you do not need to create a new email account.
| Email Forwarding Option | Description |
|---|---|
| Alias | Forward emails to an existing email account. |
| Catch-All | Forward emails from any address at your domain. |
Choose the option that best fits your needs. Most users prefer the alias option for its simplicity.
Configuring Email Forwarding
Follow these steps to configure email forwarding:
- Log in to your Namecheap account.
- Navigate to the Domain List section.
- Click on the Manage button next to your domain.
- Go to the Advanced DNS tab.
- Find the Email Forwarding section.
- Click on Add Forwarder.
- Enter the email address you want to forward from and the destination email address.
- Click Save to apply the changes.
These steps will help you set up email forwarding quickly. Ensure that you test the forwarding to confirm it works.
Maintaining Your Domain And Shopify Store
Keeping your Namecheap domain and Shopify store running smoothly requires regular maintenance. This includes renewing your domain and updating your store regularly. Both tasks are crucial to ensure a seamless experience for your customers.
Renewing Domain
Renewing your domain ensures your store remains accessible. Namecheap offers easy domain renewal options:
- Log in to your Namecheap account.
- Go to the Domains section.
- Select the domain you want to renew.
- Click on Renew and choose the renewal period.
Set up auto-renewal to avoid missing the renewal date. This ensures your domain remains active without manual intervention.
Regular Store Updates
Regular updates keep your Shopify store fresh and secure. Here are some tasks to consider:
| Task | Frequency |
|---|---|
| Check for theme updates | Monthly |
| Update product listings | Weekly |
| Review security settings | Monthly |
| Backup your store data | Weekly |
Follow these steps to keep your store functioning at its best. Always backup data before making changes. This helps prevent data loss.
Frequently Asked Questions
How Do I Connect Namecheap Domain To Shopify?
To connect your Namecheap domain to Shopify, first, log in to your Namecheap account. Navigate to the domain list, select your domain, and update the DNS settings to point to Shopify’s IP address.
Is It Easy To Use Namecheap With Shopify?
Yes, it’s straightforward to use Namecheap with Shopify. Just update your domain’s DNS settings. Shopify provides clear instructions to guide you through the process.
How Long Does Domain Setup Take?
Typically, it takes about 24 to 48 hours for DNS changes to propagate fully. However, some users may see changes within a few hours.
Can I Use My Existing Namecheap Domain?
Yes, you can use your existing Namecheap domain with Shopify. Simply update the DNS settings to point to Shopify’s servers.
Conclusion
Connecting your Namecheap domain to Shopify is simple and effective. It enhances your online store’s professionalism. Follow the steps outlined for a smooth setup. Remember to verify all settings. This ensures your domain works perfectly. Happy selling with your new Shopify store!