Miro is a versatile digital whiteboard gaining traction in project management. Teams worldwide tap into its collaborative features for better project outcomes.
Table of Contents
Mastering Miro for project management can transform the way teams brainstorm, plan, and track their work. This powerful tool offers an interactive canvas where ideas can take shape and evolve in real-time. Whether you’re a seasoned project manager or new to the field, understanding how to leverage Miro’s capabilities will streamline your workflow and enhance team coordination.
In this guide, we’ll walk through the basics of setting up your project management space in Miro. We’ll cover how to create boards, use templates, and integrate Miro with other tools. With easy steps, you’ll learn to manage tasks, set deadlines, and foster collaboration among your team members. By the end of this post, you’ll be equipped with the know-how to effectively utilize Miro, making your project management process more efficient and interactive. Let’s dive in and discover how Miro can support your project management needs.
Credit: miro.com
Introduction To Miro
Welcome to the world of Miro, a dynamic canvas for all your project management needs. Teams across the globe turn to Miro to bring their ideas to life. With its intuitive interface, Miro stands out as a versatile tool in the realm of project planning and collaboration.
What Is Miro?
Miro is an online collaborative whiteboarding platform. It lets teams visually map out projects with ease. Users can create, share, and discuss ideas in real-time, regardless of their location. Miro acts as a central hub for team interaction and creativity.
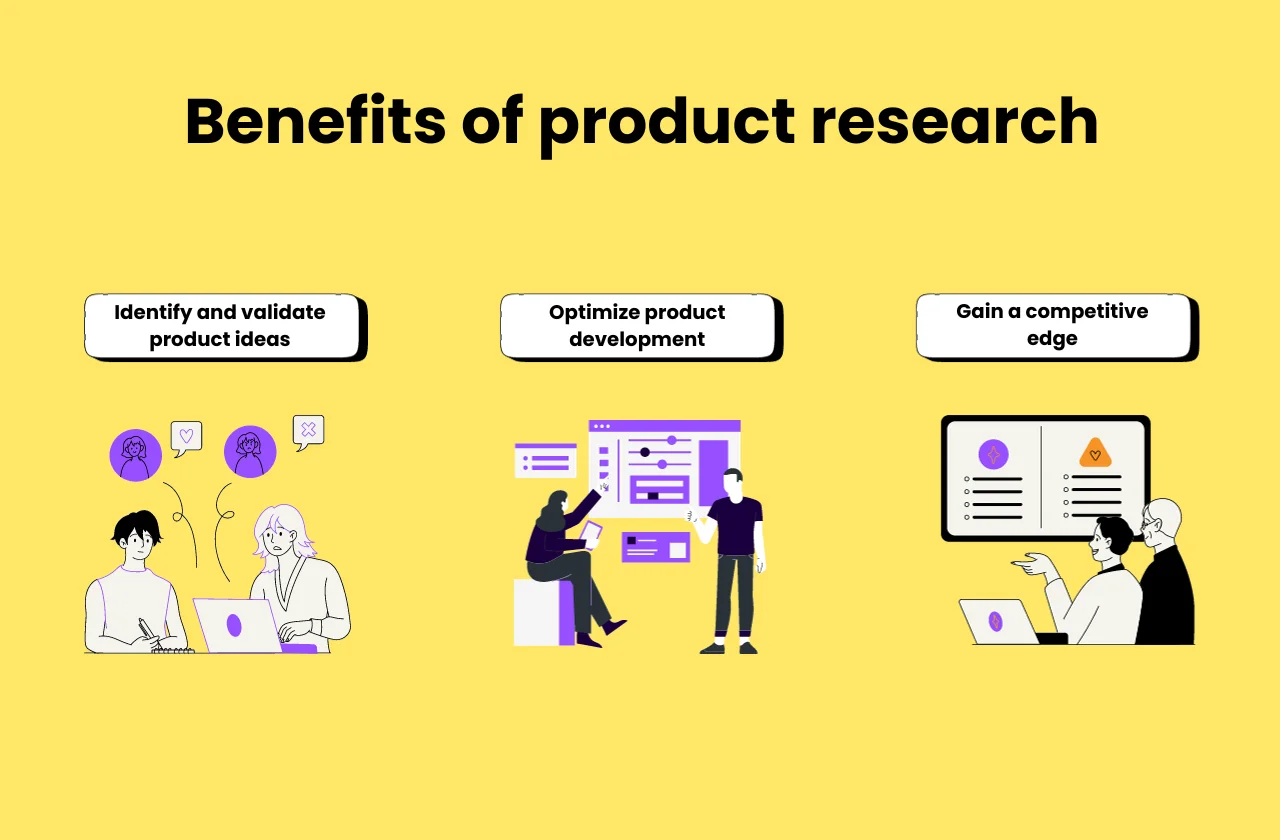
Benefits Of Using Miro In Project Management
Miro offers a suite of features that streamline project workflows. Its benefits include enhanced collaboration, real-time communication, and the ability to integrate with many tools. Teams stay aligned and can track progress visually, making project management smoother and more efficient.
Credit: miro.com
Setting Up Your Miro Account
Welcome to the first steps of managing projects with Miro! Setting up your Miro account is simple and opens a world of efficiency. Follow this guide to start your journey.
Creating An Account
Sign up on the Miro website. Fill in your email, set a password, and you’re on your way. Confirm your email through the link sent to you. Choose the plan that fits your needs best. Free plans are great for starters, while paid ones offer more features. Complete your profile. This helps team members know who you are. Now, you’re ready to create or join your first project!
Navigating The Dashboard
The dashboard is where your projects live. Find it right after you log in. See your boards in one place. Create new boards with the ‘+’ button. Join others’ boards with an invite link. Organize boards into projects for better management. Use the search bar to find specific boards quickly. Look to the left for the toolbar. This is where settings, help, and account info are found.
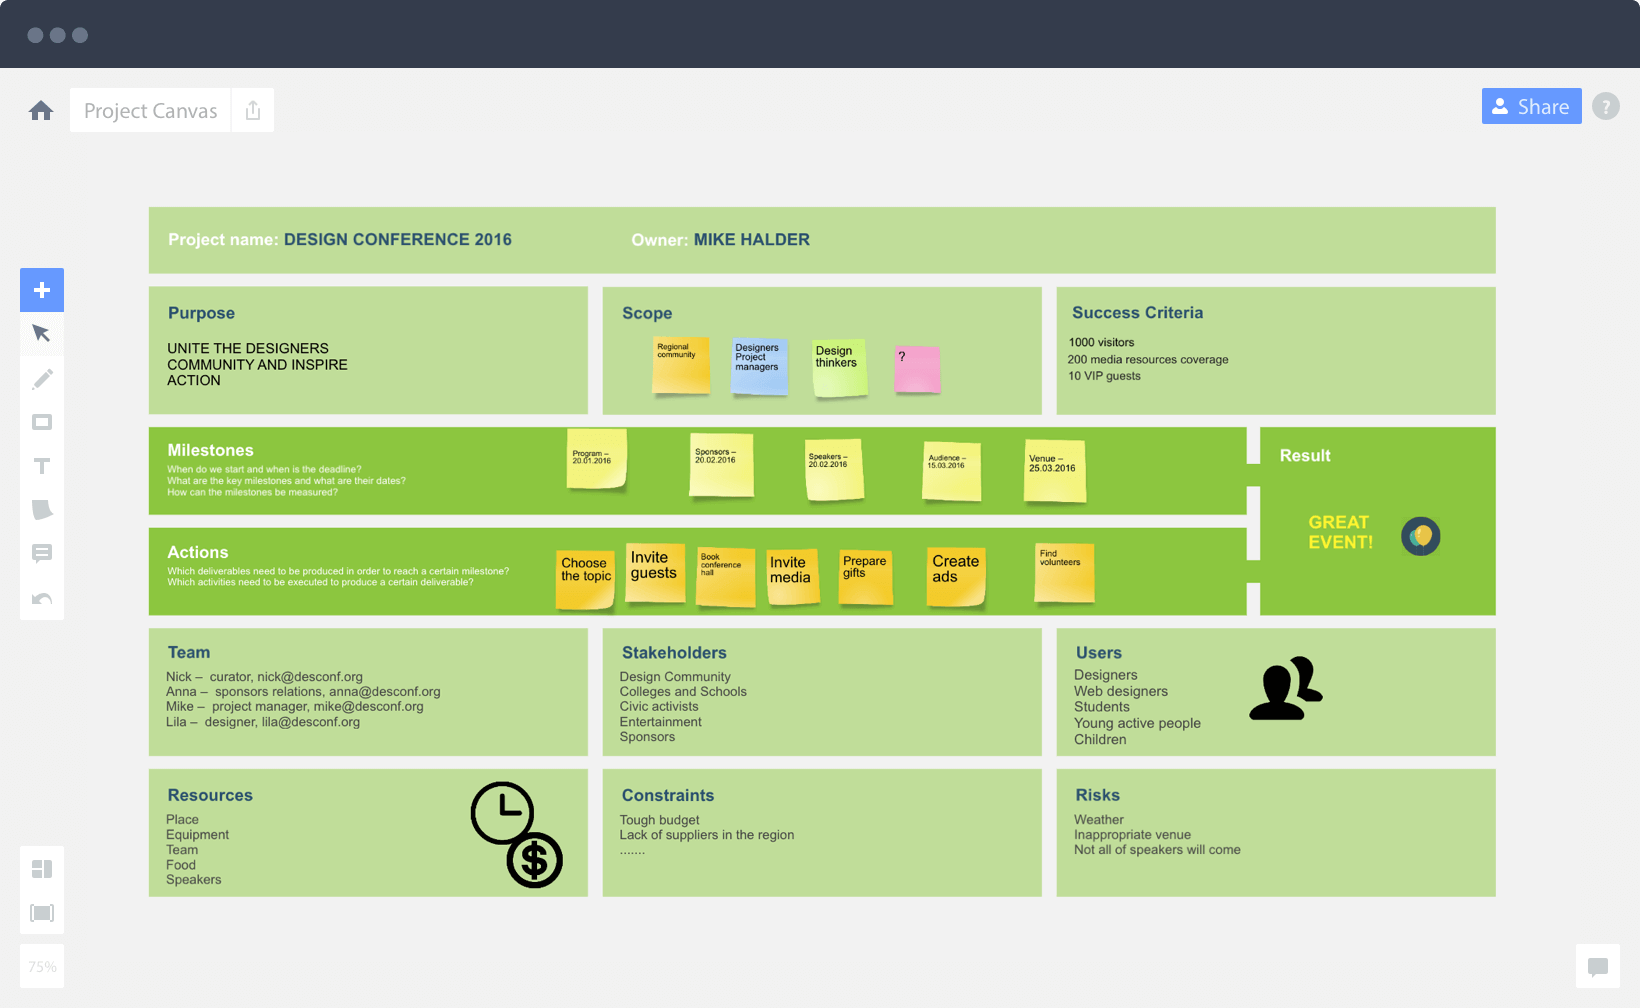
Building Your First Project Board
Let’s dive into building your first project board with Miro. It’s a key step for managing projects smoothly. We’ll start with choosing the right template. Then, we move to customizing your board. These steps are simple but powerful.
Choosing A Template
Miro offers many templates. Each suits different project needs. First, think about your project goals. Do you need to track tasks? Or maybe brainstorm ideas? Miro has it all.
- Go to the Template Gallery in Miro.
- Look through categories. Find one that matches your project.
- Select a template. Click “Use Template”.
Templates save time. They also make sure you don’t miss important parts of your project.
Customizing Your Board
Now, make the board yours. Miro lets you change almost everything.
- Drag and drop elements to rearrange them.
- Use the toolbar to add new shapes, texts, or images.
- Color code items for better organization.
Remember, a well-organized board leads to a smoother project. It helps everyone stay on the same page.
Start small. Add more details as your project grows. This way, you won’t get overwhelmed.
Credit: miro.com
Collaboration Tools In Miro
Collaboration Tools in Miro unlock the potential for teams to work together seamlessly. From brainstorming sessions to project planning, Miro serves as a central hub for collective efforts. Effective use of its tools ensures projects stay on track and team members remain on the same page.
Real-time Collaboration Features
Miro’s real-time collaboration features transform remote work into an interactive experience. Team members can work on the same board simultaneously, making live edits and adjustments.
- Live cursor tracking – see where teammates point and click.
- Board updates – watch changes happen in real time.
- Unlimited participants – invite the whole team to join in.
Communication Tools
Communication is key in project management, and Miro’s tools make it straightforward. With built-in chat and video conferencing, teams can discuss ideas without leaving the platform.
| Tool | Function |
|---|---|
| Chat | Send instant messages for quick discussions. |
| Comments | Leave feedback directly on the board. |
| Video calls | Start meetings without external apps. |
Task Management With Miro
Managing tasks in Miro makes project management smooth. This visual tool helps teams see who does what and by when. From sticky notes to detailed task boards, Miro supports it all. Let’s explore how to manage tasks effectively using Miro.
Creating Tasks And Assignments
Starting with tasks in Miro is easy. First, select a template or create a new board. Then, add tasks using sticky notes or cards. Write clear task titles. Assign them to team members. Set due dates. Don’t forget to add details. Use colors and tags for quick sorting. This keeps everyone on the same page.
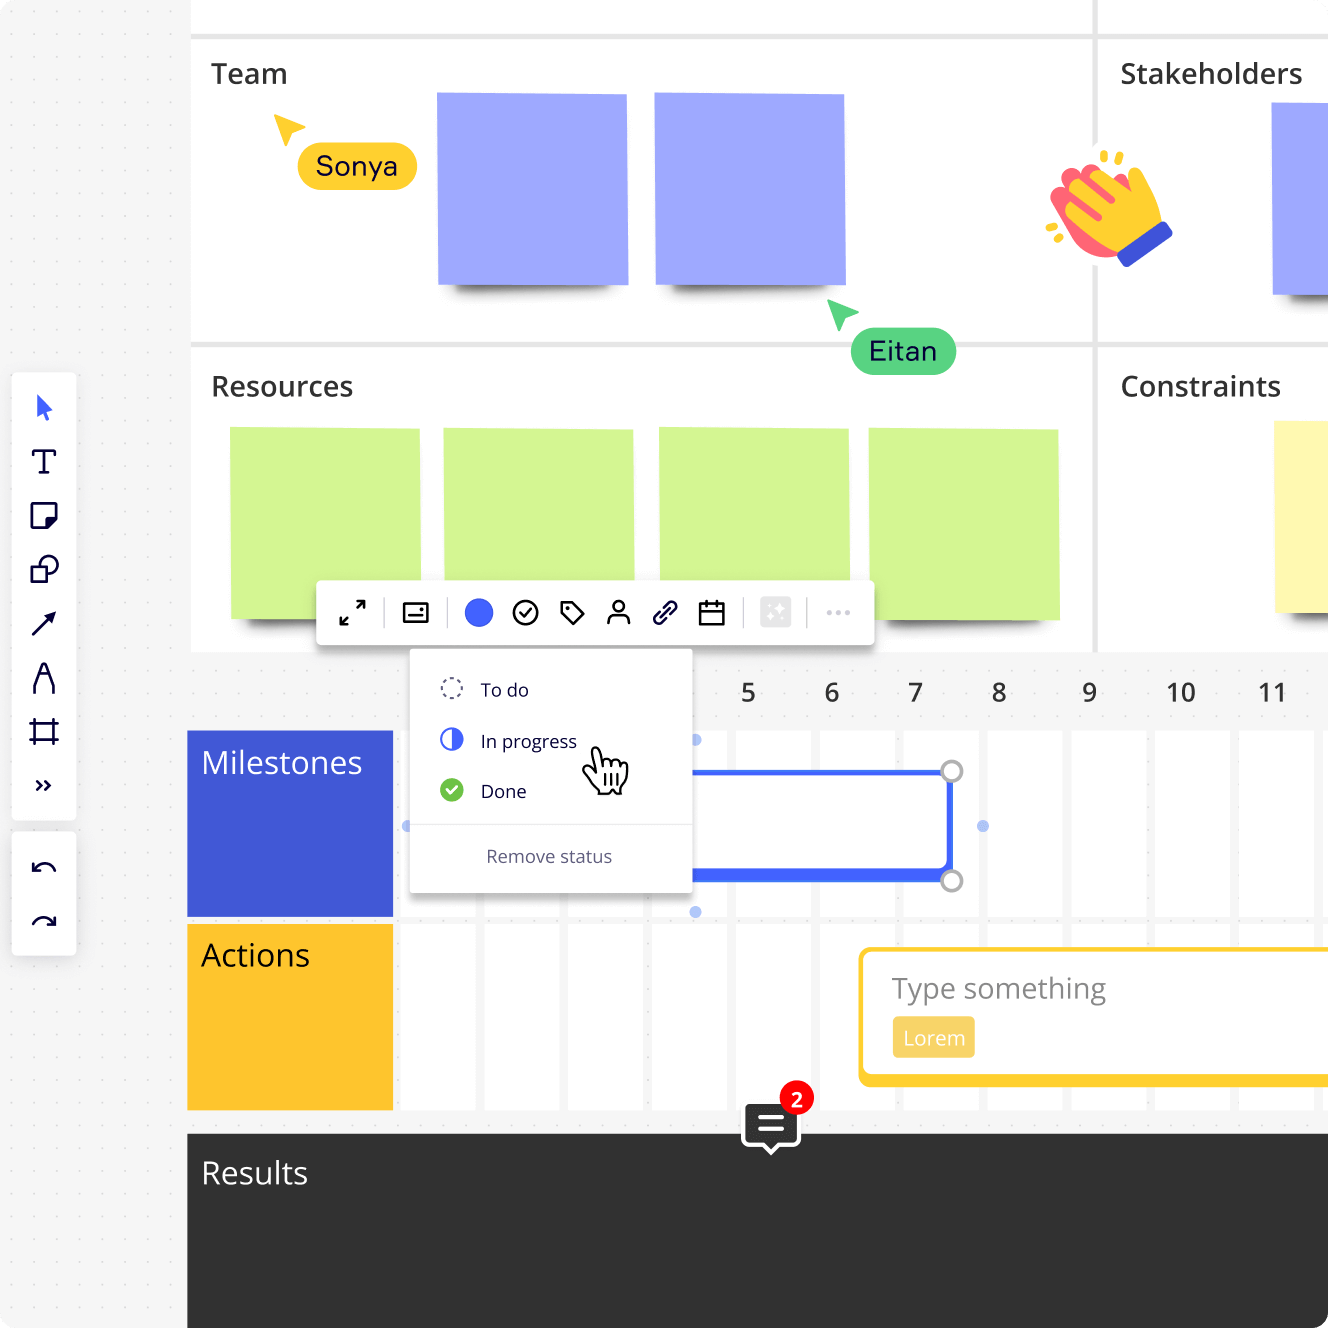
Tracking Progress
Watching progress in Miro keeps teams motivated. Use status columns to track tasks. Move tasks from ‘To Do’ to ‘Done’. Update task statuses regularly. This helps spot delays early. Use Miro’s timeline feature to see the big picture. This way, teams stay on track and projects move forward.
Integrations For Enhanced Project Management
Let’s talk about using Miro for better project management. Miro’s integrations make managing projects easier. These tools help teams work smoothly. Now, we will explore how connecting Miro with other tools and streamlining workflows can boost your project management.
Connecting With Other Tools
Miro connects with many tools. This helps teams bring all their work into one place. Let’s see how this works.
- Share files easily from Google Drive, Dropbox.
- Communicate with Slack, Microsoft Teams for quick chats.
- Manage tasks with Asana, Trello, and Jira.
These connections mean less switching between apps. Teams stay focused.
Streamlining Workflows
Making workflows smoother is key. Miro’s features help teams do tasks faster.
- Start with templates for common project types.
- Use boards to organize ideas and tasks.
- Automate updates to keep everyone informed.
With these steps, teams can see project status at a glance. Work flows better.
So, Miro’s integrations and tools help teams work better together. They save time and keep projects on track. Try these tips to make your project management smoother.
Best Practices For Using Miro
Mastering Miro transforms project management. This visual collaboration platform brings teams together. Let’s look at best practices for harnessing its full potential.
Organizing Your Boards
Structure is key in Miro. Keep boards clean and categorized. Use the following tips:
- Titles and Descriptions: Name boards clearly. Add descriptions for context.
- Frame Tool: Group related content. It keeps boards easy to navigate.
- Color Coding: Assign colors to tasks or team members. It aids quick identification.
- Templates: Use Miro’s templates. They save time and maintain consistency.
Tips For Effective Collaboration
Collaboration fuels projects. Use these strategies in Miro:
- Set Permissions: Control who can view or edit. It protects board integrity.
- Commenting Feature: Use comments to communicate. It’s direct and efficient.
- Live Embeds: Insert documents or videos. They enrich the discussion.
- Regular Check-ins: Schedule sessions to review boards. It ensures alignment.
Advanced Features To Explore
Exploring the advanced features in Miro opens up a world of possibilities for project management. Whether it’s adapting to Agile & Scrum methodologies or coordinating remote teams, Miro’s interactive whiteboard platform takes collaboration to the next level. Let’s delve into these sophisticated tools to enhance your project workflows.
Using Miro For Agile & Scrum
Miro’s flexible boards cater to Agile & Scrum frameworks with ease. Teams can create and customize Scrum boards for sprints, backlogs, and retrospectives. The platform’s versatility supports real-time collaboration, ensuring every team member stays in sync.
- Create User Stories and Tasks with sticky notes
- Track progress with Burndown Charts
- Run Sprint Planning with digital planning poker
- Organize Retrospectives using pre-made templates
Interactive elements like voting and timers make Scrum ceremonies engaging. Teams can prioritize tasks and reflect on sprints effectively.
Leveraging Miro For Remote Teams
Remote teams thrive with Miro’s collaborative environment. The tool’s live co-editing and communication features bridge the gap between distributed team members. Miro integrates with popular apps like Slack and Zoom, centralizing your workflow.
| Feature | Description |
|---|---|
| Video Chat | Discuss projects without leaving the board |
| Screen Sharing | Present ideas and get instant feedback |
| Project Timelines | Visualize deadlines and milestones |
| Document Embedding | Access all resources in one place |
With Miro, remote work becomes seamless and productive. Teams can brainstorm, plan, and execute projects, regardless of their location.
Frequently Asked Questions
Can Miro Replace Traditional Project Management Tools?
Miro offers a visual collaboration platform that complements traditional project management tools. It focuses on brainstorming, ideation, and planning with digital whiteboards, rather than on task assignment and tracking.
How Does Miro Facilitate Remote Team Collaboration?
Miro enables remote teams to collaborate in real-time on a shared digital whiteboard. It provides tools for brainstorming, diagramming, and project planning, ensuring teams stay aligned and can contribute from anywhere.
What Are Miro’s Key Features For Project Managers?
Miro’s key features for project managers include collaborative whiteboards, pre-built templates, integration with popular tools like Jira and Asana, and robust facilitation features to guide team sessions effectively.
Is Miro Suitable For Agile Project Management?
Yes, Miro supports Agile practices with features like user story mapping, sprint planning boards, and retrospective templates, making it suitable for teams following Agile methodologies.
Conclusion
Miro shines in managing projects, making collaboration smooth and visual. You now know the basics to get started. With its user-friendly interface, you can plan, track, and share work easily. Give it a try on your next project. Your team will appreciate the clear communication.
Miro keeps everyone on the same page. So, embrace this tool for better project outcomes. Remember, practice makes perfect. Keep exploring Miro’s features for smoother project flows. Your efforts will pay off with a more organized team and successful projects.